The following is a guide on how to enable and use Multi-factor Authentication (MFA) for your Human Research Ethics Application (HREA) account.
How to enable MFA - External Portal Setup
Note: You will also need to download the 'Google Authenticator' or 'Microsoft Authentication' app onto your smartphone or device.
Step 1
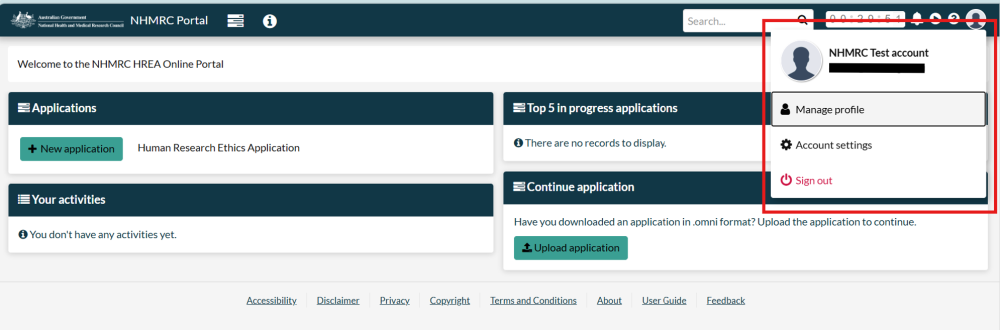
Log in to your HREA account. Navigate to Account Settings by clicking the profile avatar icon at the top-right corner of the page.
Step 2
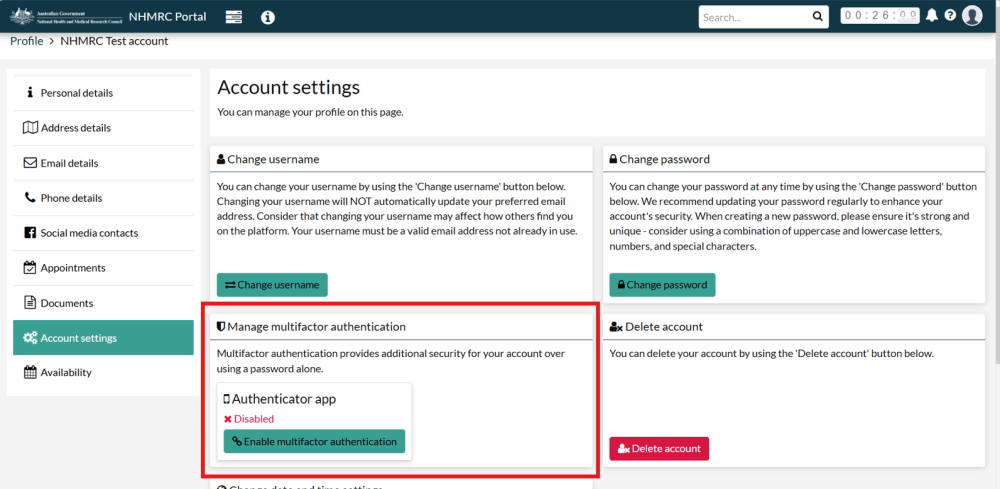
See the Multifactor authentication area on the Account settings page. Click the Enable multifactor authentication button to enable the feature.
Step 3
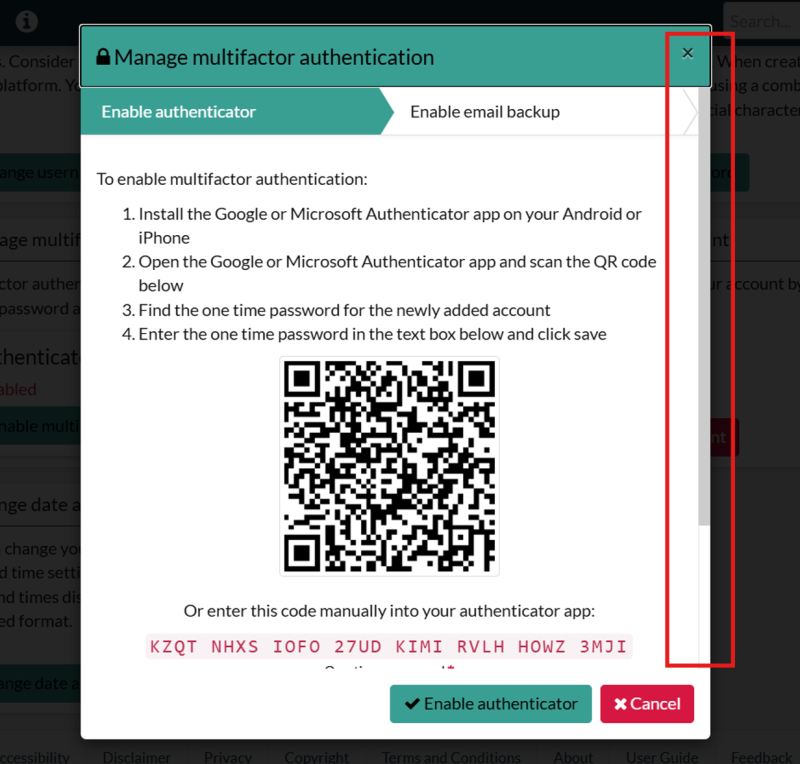
- Open the Google or Microsoft Authenticator app on your device. Click the + button to find the Scan a QR code feature. Scan the QR code given on the pop-up on your HREA account screen.
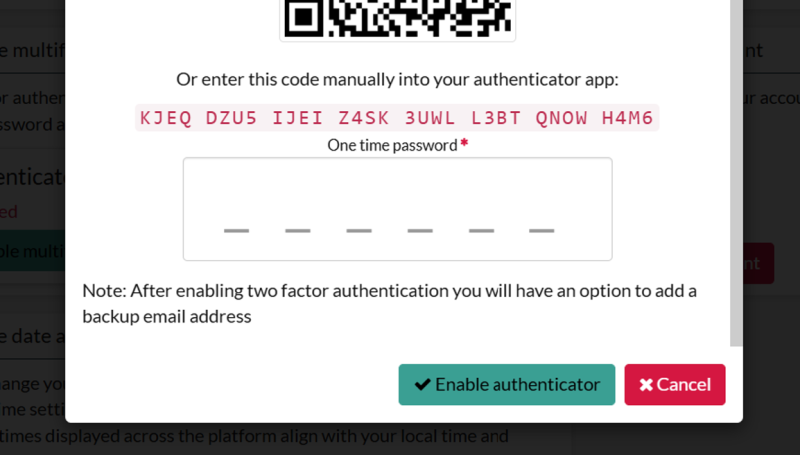
- Find the one-time password for the newly added account in your authenticator app.
- Enter the one-time password in the field on the pop-up screen (scroll down the pop-up to find the field). Click Enable authenticator.
How to enable email MFA
Step 1
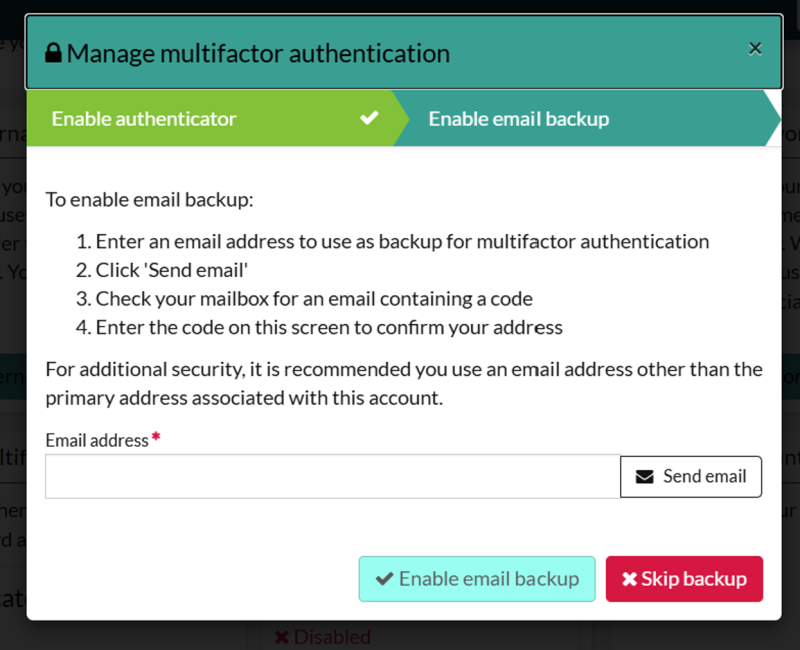
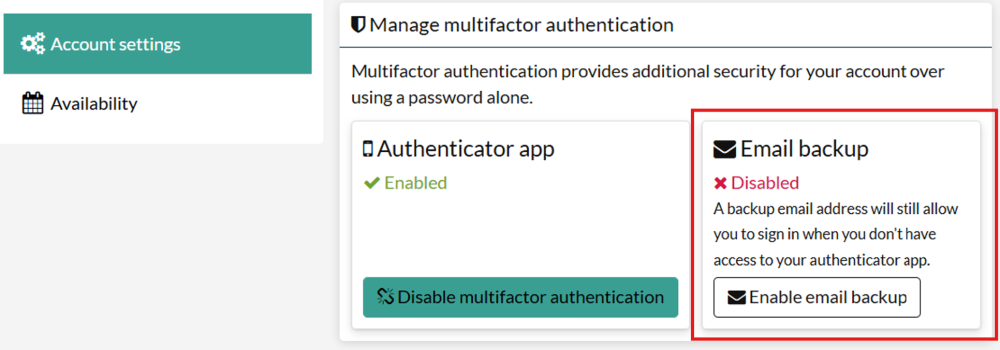
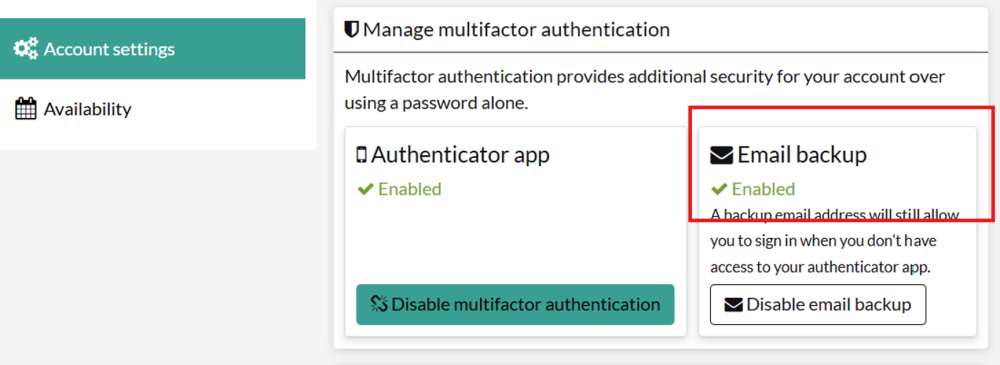
To enable email backup MFA, ensure you have enabled MFA first using your authenticator app. You can then enable email backup as a part of the MFA set-up process.
Step 2
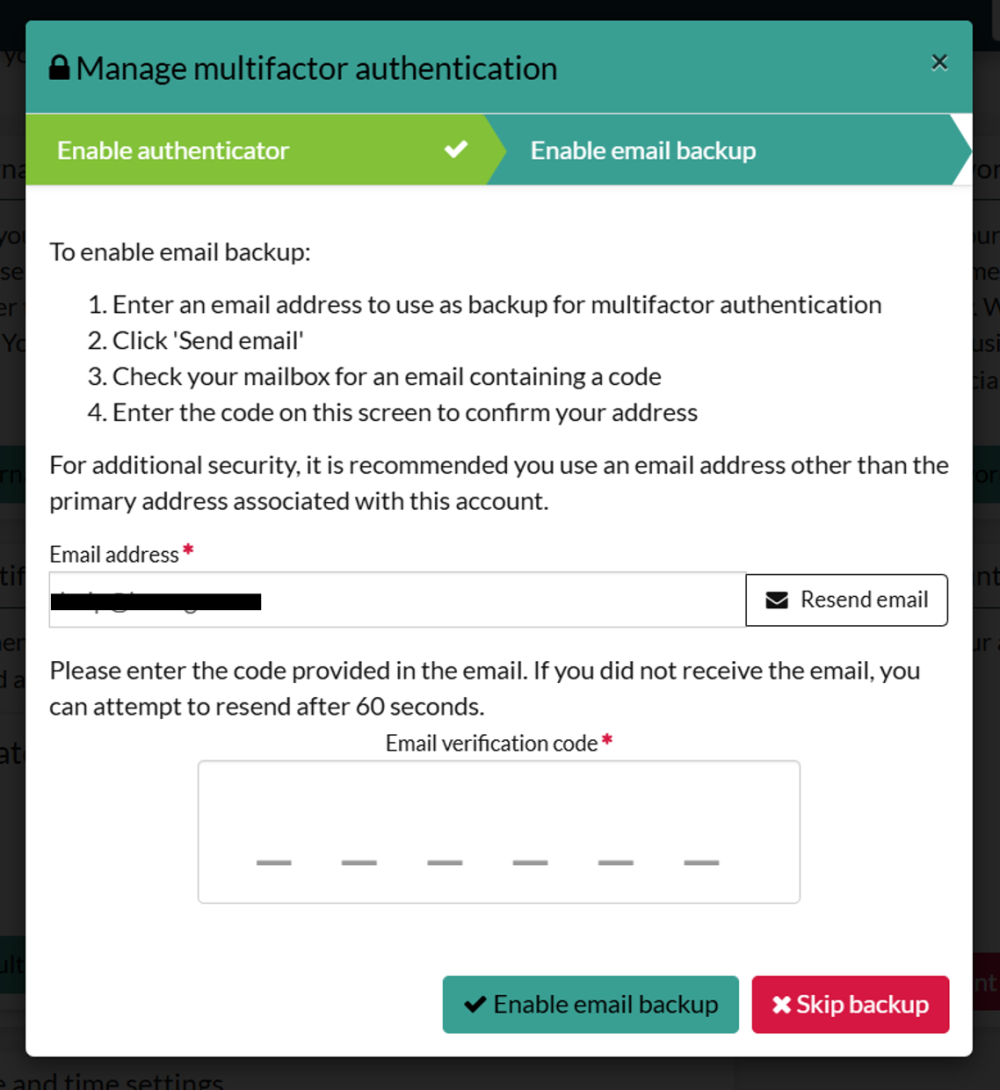
Follow the on-screen instructions to register an email address and then confirm using the one-time code sent to your nominated email address.
Step 3
If you skip this step, you can enable email MFA later by navigating to your Account Settings page, clicking on the Enable email backup button, and following the on-screen instructions.
How to log in to your account with MFA
Step 1
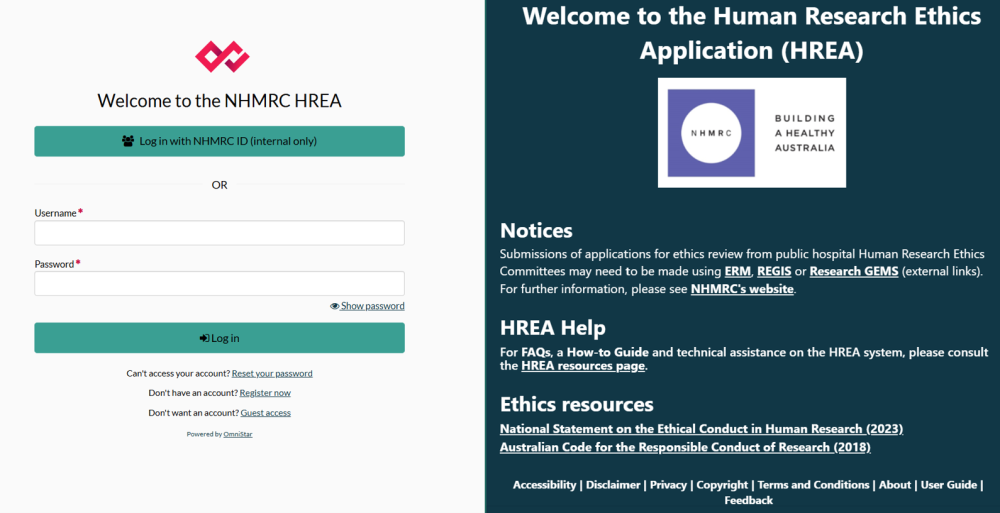
Enter your username and password on the HREA homepage.
Step 2
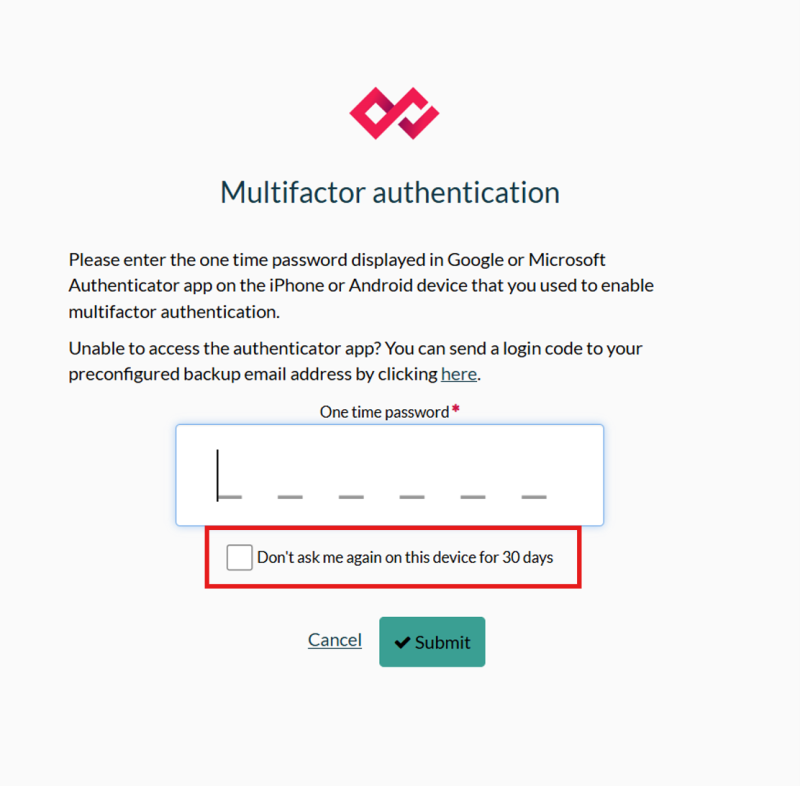
- Open the Google or Microsoft authenticator and find the one-time password.
- Enter the one-time password, and then click Submit. The one-time password will expire after a short time.
- Remember Device for 30 Days - by enabling this setting on trusted devices, and in line with your organisation’s policy, you will only be prompted to enter the one-time password every 30 days instead of with every log in. This setting is for each device, so can be selectively used on devices that you know are secure.
- Tick the box to enable the setting.
Step 3
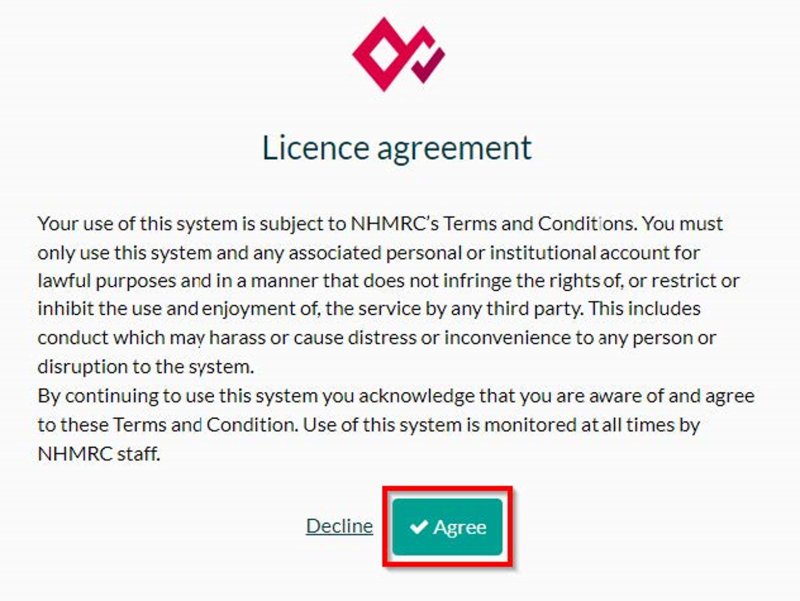
- A Licence agreement notice will appear on your screen.
- Click Agree.
- This will log you into your account.
How to log in to your account with email MFA
Step 1
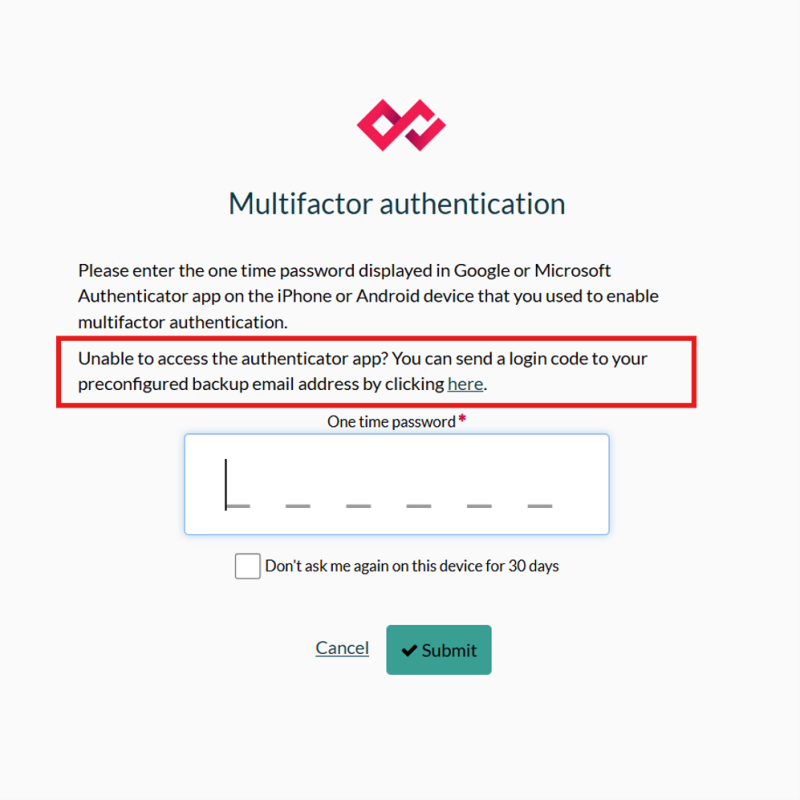
When MFA is enabled, you are presented with the MFA challenge as a part of the logon process where you can type in your authenticator app’s one-time password.
Step 2
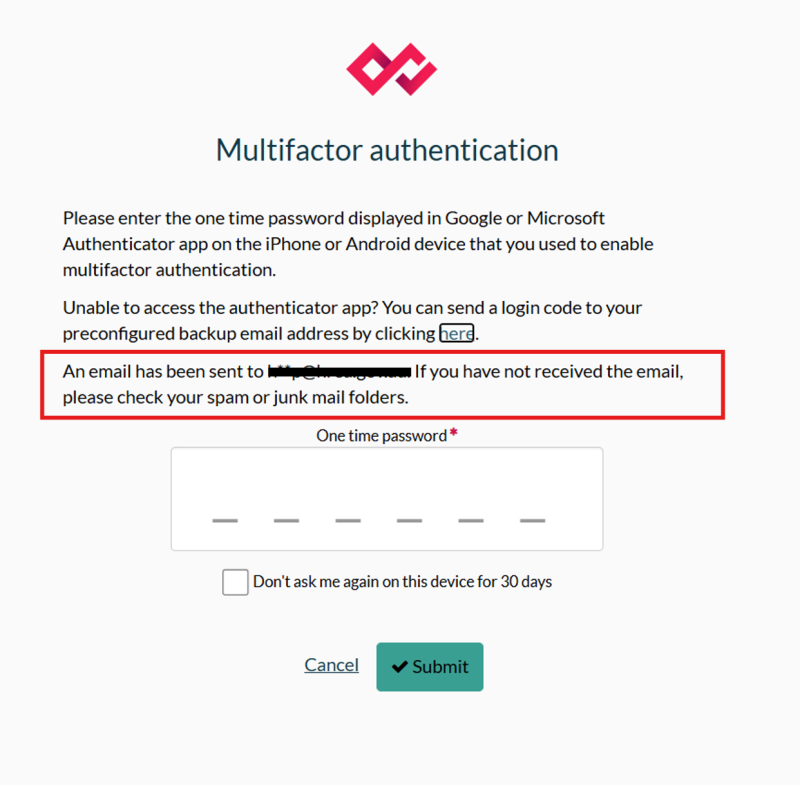
If your mobile authenticator app is not available and email backup has been set up, you can click on the link to send a code to your chosen email address. Once you have received the code, you can type it into the one-time password field and click submit.